
When planning an emergency lighting system, think of every possible way out of the building. In practice, emergency lights belong on all designated escape routes: that means along corridors and hallways, above and around exit doors, and covering any stairwell or change of level. In short, every path people might use to evacuate needs its own emergency lighting. This includes not just the main exit ways but also secondary routes, staircases, ramps and doorways. Building codes and experts agree that if you can walk there in an emergency, you should see it in the dark.
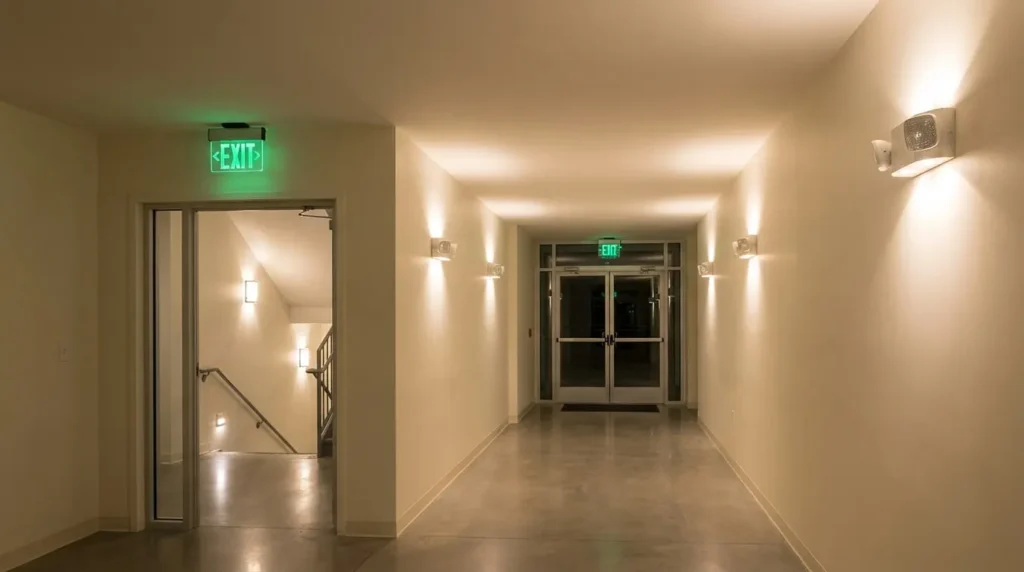
In real buildings you’ll often see emergency lights lining corridors and exitways like this. Codes (like NFPA 101 or OSHA 1910.37) say all exit routes must stay illuminated so that someone with normal vision can see and follow the path to an exit. In other words, never leave a hallway or exit doorway in complete darkness during a power outage.
Key Emergency Light Locations
- Exit Routes (Corridors, Halls, and Exit Doors): Place lights along every marked egress path. This means above each exit door and down each corridor or hallway. Lights should guide you the entire way out. For example, UK guidance explicitly says to put lighting “near each exit door intended to be used in an emergency” and along the route.
- Stairways and Landings: Stairs are especially critical – every stair flight and landing needs its own illumination. In fact, NFPA and UK code both require lights “near stairs, so that each flight receives direct light”. Don’t rely on a distant light; install fixtures so that each step and landing stays lit. (Stairwells often require wall-mounted or step-edge lights in addition to ceiling lights.)
- Intersections and Direction Changes: Anytime a corridor turns or two hallways meet, add extra lights or directional signs. Placing fixtures at corners and junctions ensures evacuees can see around the bend. Good design practice is to install additional lights at each change of direction or intersection. This makes it obvious which way to go.
- Safety Equipment & Signage: Emergency lights should shine on all critical equipment. Install lights within about 2 meters of every fire alarm, extinguisher, hose cabinet or first-aid kit. This way, people can quickly spot and use these devices during an outage. Likewise, any exit sign or safety sign (like a fire alarm pull-station or an “EXIT” sign) should have lighting aimed at it. (For instance, Wells Electrical notes that emergency lighting must be fitted within 2 m of fire alarms and extinguishers.)
- Hazardous or Enclosed Areas: Put lights in any high-risk or windowless space. Kitchens, boiler rooms, switchgear or plant rooms – basically any place where extra risks exist or natural light is zero – need emergency illumination. UK regulations, for example, require lights in all motor generator rooms, plant rooms and similar locations. Even large toilet blocks or storage rooms (anything bigger than a broom closet) without windows should have a light. The idea is to avoid any “dark corner” where people might panic or stumble.
- Large Open Areas: In wide open spaces (like assembly halls, large warehouses or big lobbies), scatter emergency fixtures so you avoid dark spots. Many rules say any open area over a certain size (e.g. 60 m²) must have its own emergency lighting. Instead of just illuminating the perimeter, place lights throughout the space so the entire floor stays lit (aiming for at least ~0.5–1 lux along the paths).
- Final Exits and Outside Routes: Don’t stop at the building edge. Install lights just outside each final exit door to guide people to safety once they’re outdoors. For example, BS 5266 advises lighting “near each final exit to the outside of the building”. Also light any outdoor walkway or stair that leads away from the exit. Emergency lighting that only works inside won’t help if the area right outside the exit is pitch-black.
Installation Tips
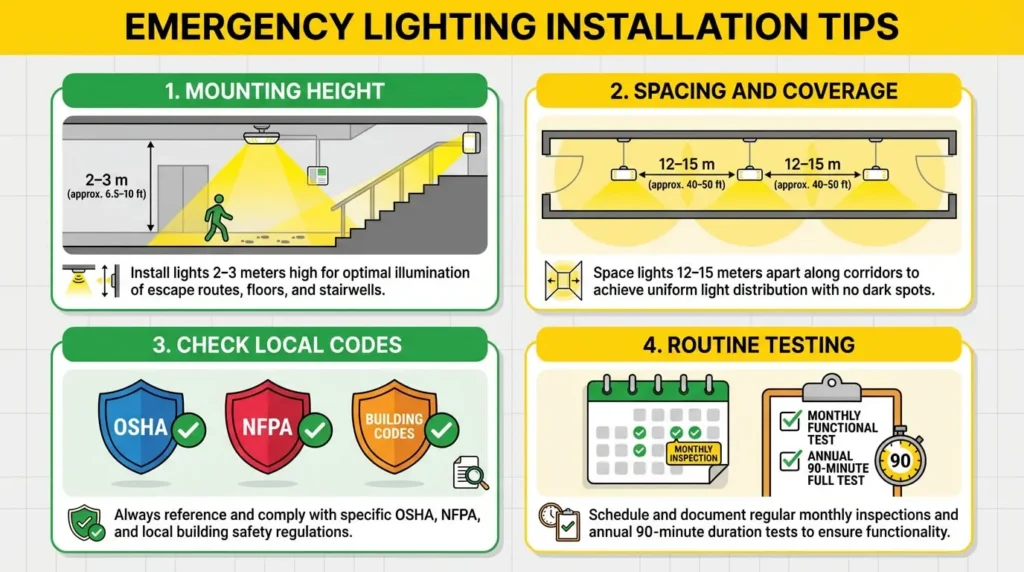
- Mounting Height: Fixtures are typically mounted on ceilings or high on walls (roughly 2–3 m off the floor). This height helps the light spread over the path. Always aim lights down the walking surface or stairs – pointing a light at the ceiling or wall is a waste. In fact, installers warn that lamps must “illuminate the walkway”; a lamp shining at the ceiling doesn’t meet code.
- Spacing and Coverage: Position lights so that there are no dark gaps along an exit route. A common practice is to space fixtures roughly 40–50 feet (12–15 meters) apart in corridors, adjusting based on brightness. After installation, you should check with a light meter: building codes generally require about 1 lux (0.1 fc) along an escape centerline and 0.5 lux in open areas. Also ensure uniformity (avoid shadows) by adding extra units at any long stretch, especially in wide or multi-segmented aisles.
- Check Local Codes: Remember that rules can vary by region. For example, OSHA 1910.37 in the U.S. explicitly requires exit routes to be “adequately lighted” and exit doors marked by lit signs, and NFPA 101 has its own requirements. Always review the specific codes (NFPA, IBC, local fire marshal, etc.) for your building type.
- Routine Testing: Finally, emergency lighting must be tested and maintained. Though not about placement, it’s worth noting you should inspect lights monthly and do a full 90-minute discharge test annually (per NFPA/OSHA). A light that’s correctly placed but out of order won’t help anyone.
Conclusion
In summary, place emergency lights everywhere occupants might walk to safety. This means along all hallways, stairwells, exit doors, and any special areas like kitchens or machine rooms. Put lights at every corner, each flight of stairs, beside every extinguisher and exit sign – even outside at the final exits. Following these guidelines ensures that if the main lights fail, people will still see the path out. Proper placement and aiming (lights on the path, not on walls) will meet codes and, more importantly, keep everyone safe.